|
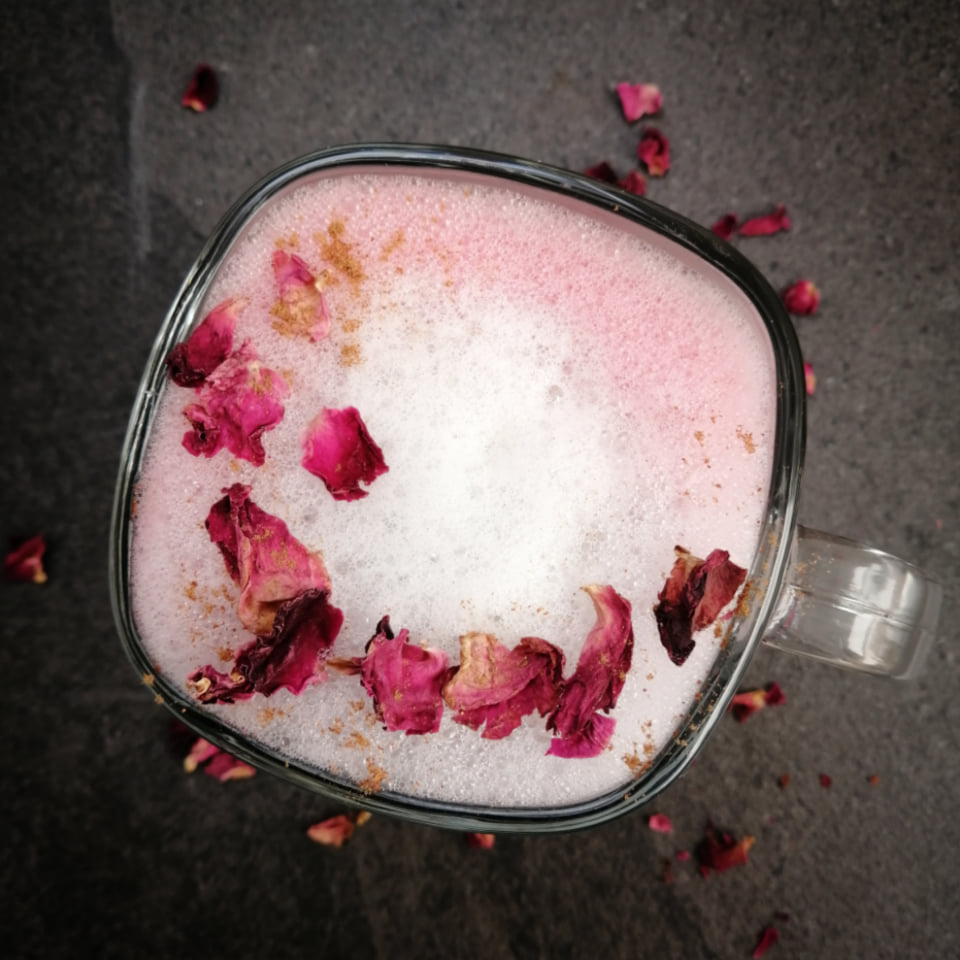
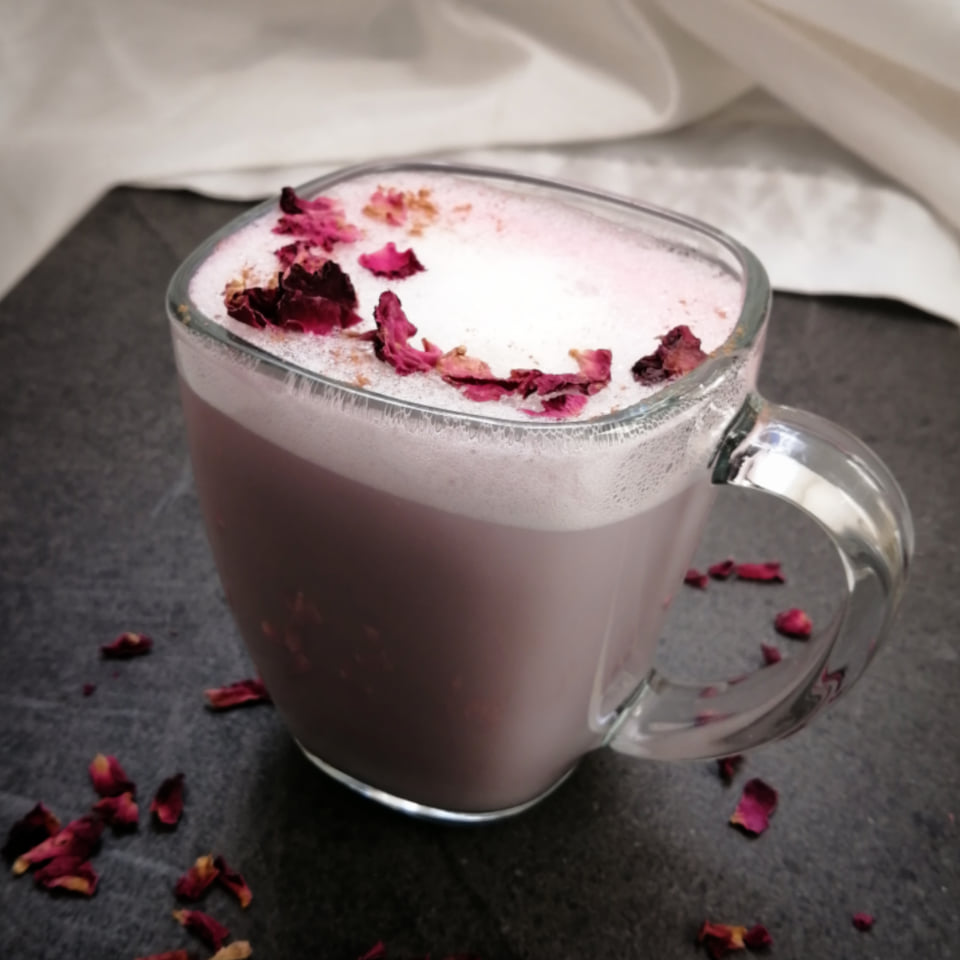
It's February. Love is in the air, and I'm feeling very chill in all meanings of the word. What better way to heat things up a bit than a hot drink and one of the more romantic herbs...rose.
This Rose Hibiscus Latte makes even the gloomiest of days feel just a little bit more special. I highly recommend pairing it with a quilt and a cuddle. Rose Hibiscus Latte Ingredients: 1/3 cup water 1/2 tsp rose water 1 Tbsp fresh ginger (diced) 1 stick cinnamon 1 Tbsp hibiscus petals 1 cup steamed milk (I used oat milk) sweetener of choice cinnamon powder, rose petals (garnish) Method: 1. Bring the first 5 ingredients to a boil in a small pan. Immediately take off the heat, cover, and steep for 5 minutes. 2. Strain into your mug. Compost the herbs. 3. Add the steamed milk to the herbal infusion. I frothed the milk first, but this is optional. 4. Sweeten as desired. I recommend maple syrup as it pairs well with the rose. 5. Garnish with edible rose petals and a sprinkle of cinnamon powder. Enjoy!
1 Comment
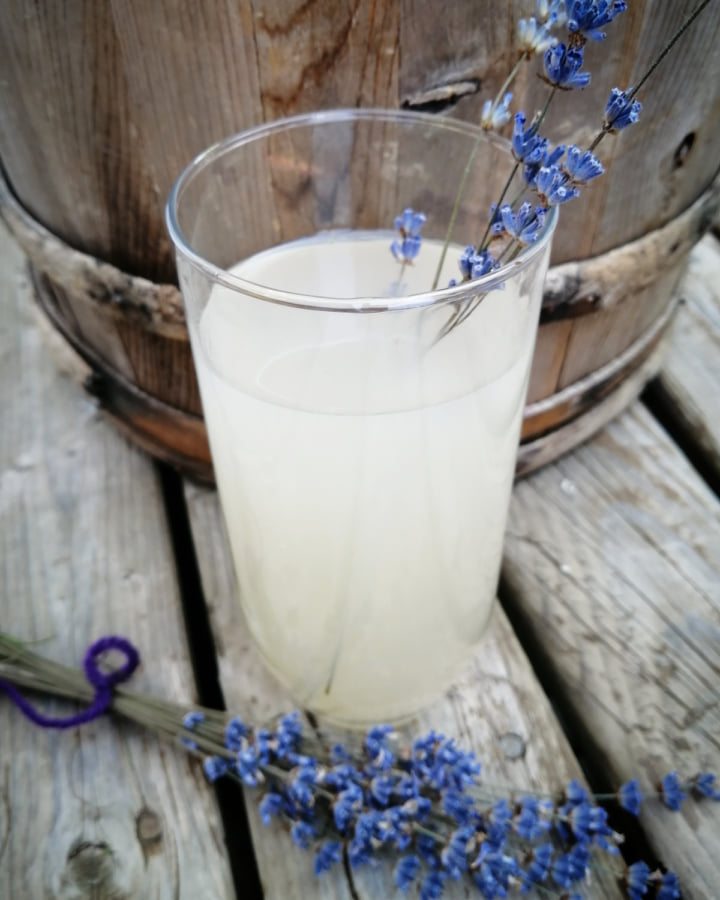
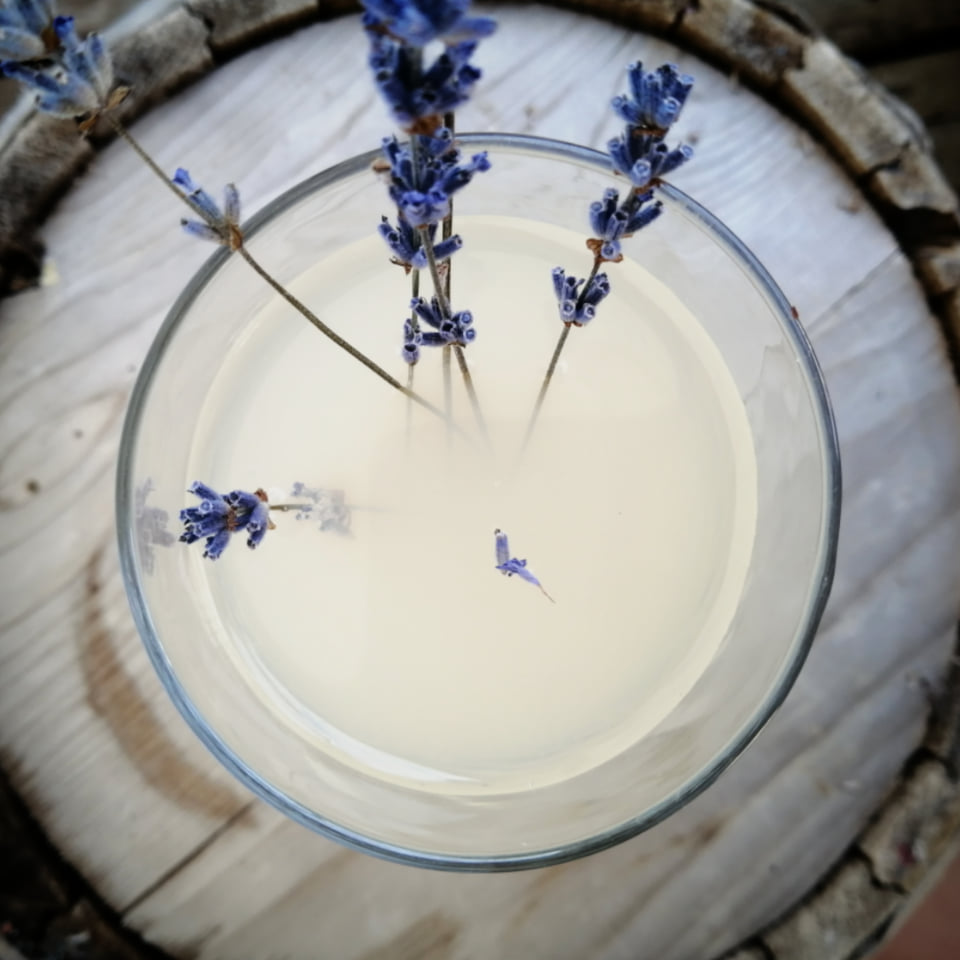
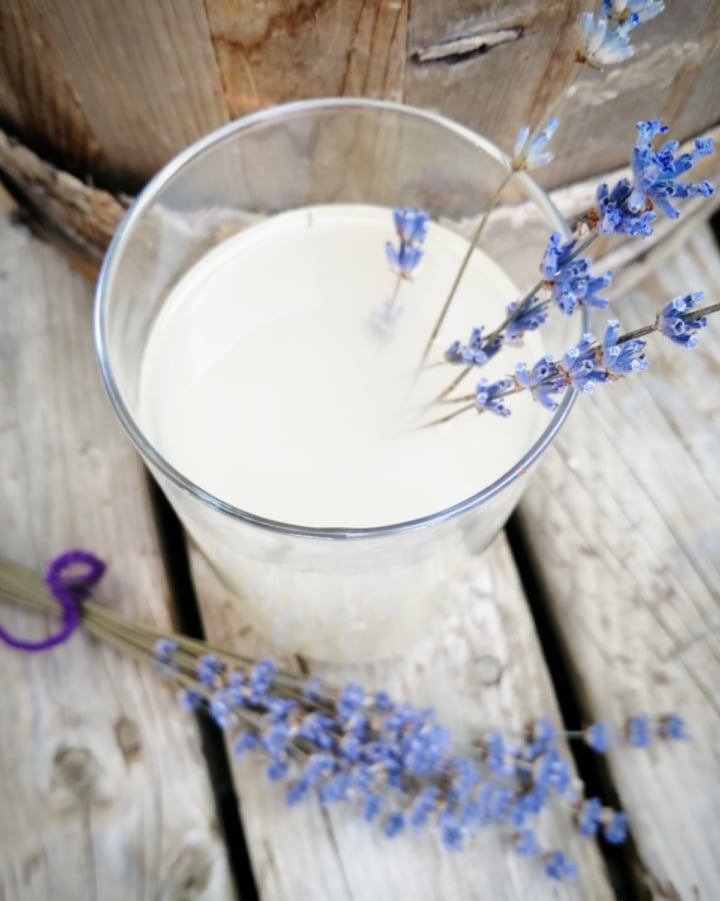
Lemonade's such a little kid thing. It brings me back to my Grandma's rickety card table at the end of the driveway, hawking glasses of watered down frozen concentrate lemonade for 50 cents a cup - the Tupperware ones that we sort of wiped down between customers. Sounds gross, but we only ever had two customers and they were related, so it's all good. But THIS lemonade. This lemonade is a cut above. What is it about Lavender that bumps up your cooking to the next level? Lemonade. yay. Lavender lemonade. Whoooo! Add in a few lemonade wands as stir sticks, and you've got a drink to impress. Here's how it goes: Lavender Lemonade Syrup 1 cup white sugar 1 cup water 3 tablespoons dried lavender Lemonade 2 cups lemon juice 4 cups of water 1 cup lavender syrup lavender sprigs and/or lemon slices to garnish Need the herbs? Visit my Etsy shop. Method 1. First, you'll make the lavender syrup. If you want to double or triple that amount, you go for it. You'll use it for the lavender lemonade, but you can also use it as a tea sweetener, on ice cream, in desserts, anywhere a syrup would normally go. 2. In a small saucepan stir together the sugar, water, and lavender. Bring to a boil, then lower the heat to a simmer. Keep at a simmer for 30 minutes or so, until reduced by about half. 3. Take from the heat and refrigerate. I like to let it steep overnight to make the infusion strong, but it's all about preference. 4. Once you have the strength you desire, strain the syrup. 5. Next comes the lemonade. In a large jug, add the lemon juice and water. Add one cup of the strained lavender syrup. 6. Taste it. If it says, "Yes! This is awesome!" leave it be. If your mouth puckers, add more syrup. Too sweet? A little more lemon. It's all to taste. 7. Serve over ice (maybe mint ice cubes?!). Garnish with lemon slices or lavender sprigs. If you want to try something really special, try adding other herbs to the syrup. Herbs that come to mind are mint (classic) and rosemary (going to be a classic, IMO).
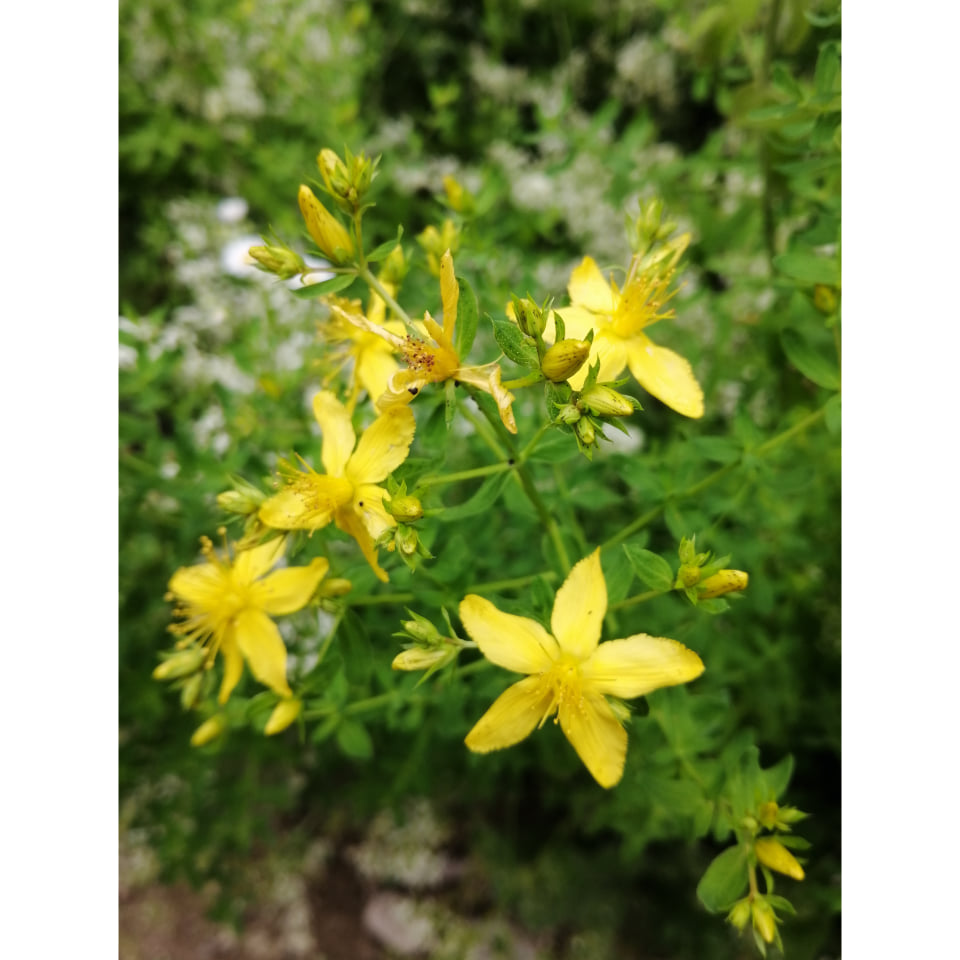
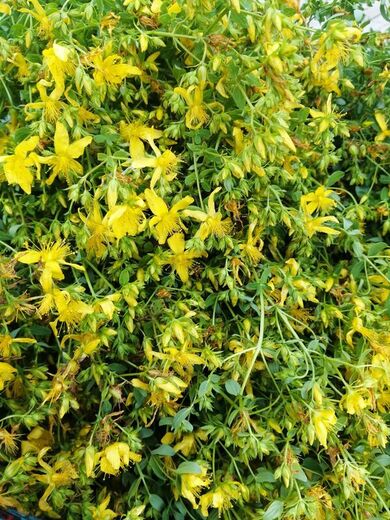
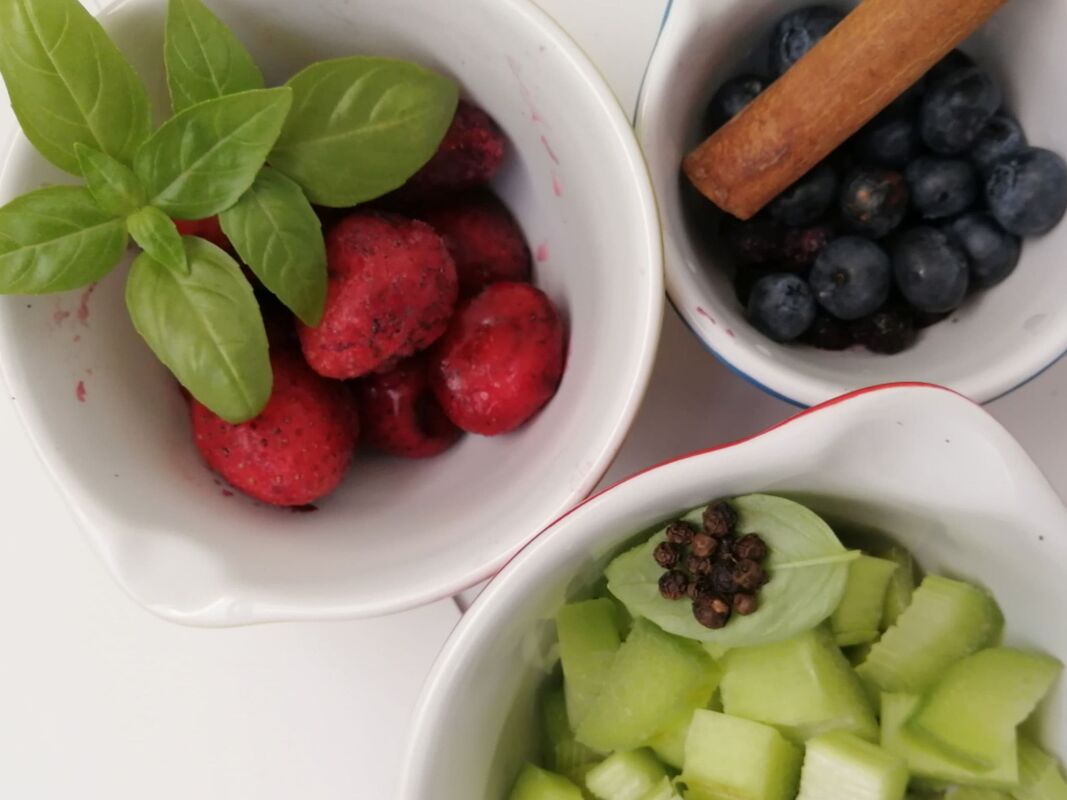
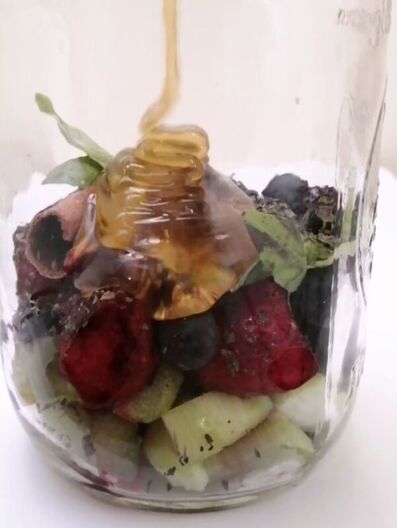
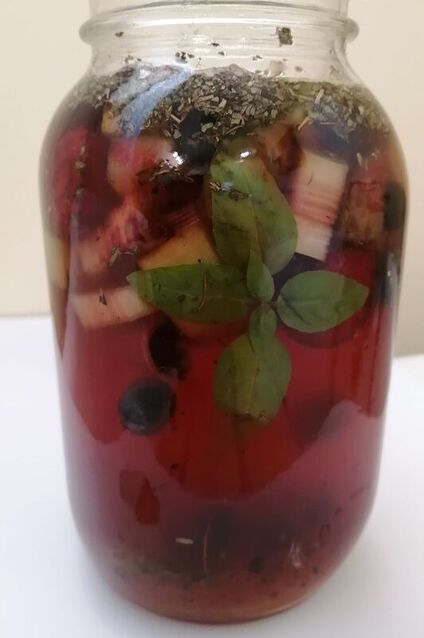
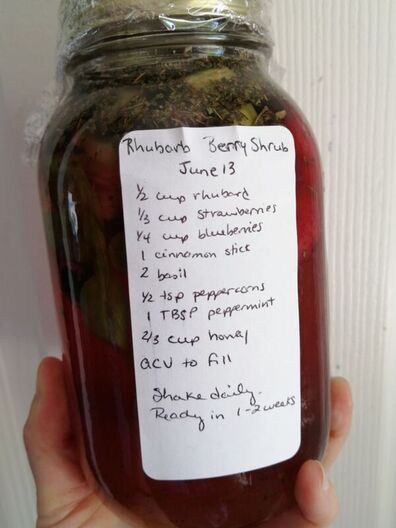
Enjoy! St. John's wort (Hypericum perforatum) is in full bloom in New Brunswick right now. It is a beautiful plant, with cheerful yellow flowers. It has quite a distinct smell, and some very unique characteristics. It can grow several feet tall, and has a woody base. The flowers grow in clusters at the end of the branches. Each flower is bright yellow, has five petals, numerous stamen, and a single pistil. The leaves and flowers have small black dots. The leaves, if held up to the light, are peppered with transparent 'holes' (actually oil glands), which makes sense when you consider the latin name of the plant, perforatum (perforation). Possibly the coolest part of the plant, though, is that despite it's cheerful yellow colour, it 'bleeds' a dark purple. Squeeze a plump flower bud between your fingers, and it will stain your fingertips dark purple. St. John's wort has been extensively studied for its actions against mild and moderate depression. It has gained such a solid reputation as an antidepressant that it isn't strange anymore to have allopathic doctors recommend it to their patients who wish to avoid pharmaceutical antidepressants. It is not, however, a pharmaceutical and lacks the instant action that some people have come to expect from man-made drugs. It needs to be taken over a period of time for its full effect to be felt, at least 2-3 weeks, and often months. Used properly, it is very effective due to the herb's active constituents. These increase the serotonin levels in the body, and level out the 'feel-good' neurotransmitters of dopamine, serotonin, and noradenaline to make them last longer in the body. Topically, St. John's wort is wonderful for soothing and healing bruises, sore muscles, sprains, and burns. It is best used as an oil in this case. The oil and tincture must be made with fresh buds and flowers for it to be effective because the hypericin (active constituent) does not last as well in the dried plant matter. So, the few weeks when St. John's wort is ready is a very busy time of oil and tincture making! To know when the plant is ready, squeeze a bud between your fingers. If it is filled with purple 'juice', it's time. These flowers and buds are at their peak. Most of the plant is at the bud stage, which is best. The buds are plump and juicy and ready to be made into remedies! St John's Wort Tincture St. John's wort flowers and buds vodka glass jar with lid label Method: 1. On a bright, warm day, pick enough St. John's wort buds and flowers to fill a glass jar 3/4 full. The plant matter should be fairly packed, but not too tightly. 2. Fill the jar with vodka (80 proof, or 40% alcohol) so there is very little headspace. The alcohol must completely cover the plant matter. Use a spoon to smoosh down the herbs if they float. 3. Cap the jar, being sure to put a non metal barrier between the alcohol and the lid. Parchment paper or plastic wrap works well. 4. Label with the ingredients and date. Store in a dark, cool cupboard for 6 weeks, shaking daily. The tincture will be a deep red colour. DOSE: Generally, 1/2 to 1 tsp twice daily. Cycling is important. Take it for 3 weeks, discontinue for 1 week, and repeat. SAFETY: Some people experience photosensitivity when taking St. John's wort. Discontinue if you experience skin issues. St. John's wort should not be taken in conjunction with pharmaceutical antidepressants without the guidance of your doctor. If pregnant or breastfeeding, seek the guidance of a health-care practitioner. ** This is fun, right?! And that's all it is for now. Information on the traditional uses and properties of herbs in this website are for educational use only, and are not to be mistaken for medical advice. Every attempt has been made for accuracy, but none is guaranteed. Many traditional uses and properties of herbs have not been validated by the FDA or Health Canada. If you have health issues, concerns, or questions, consult your health care practitioner. ** More info: Gladstar, Rosemary, Medicinal Herbs A Beginner's Guide, Story Publishing, North Adams, MA. 2012 https://www.ediblewildfood.com/st-johns-wort.aspx I don't think I have really given my rhubarb patch the full appreciation it deserves. Rhubarb was one of those infamous foods that, as children, we only ever ate on a dare, or as an excuse to dip something into sugar. So tart it's sour, its not the type of thing you eat for fun. Or do you? Hmmm? This spring, I found myself into a rhubarb groove. Rhubarb juice, rhubarb lemonade, rhubarb crisp, rhubarb muffins, oh, my. It was only natural that a rhubarb shrub would follow. A shrub is basically an oxymel, which is a blend of honey, vinegar, and herbs. What makes an oxymel and a shrub different is the addition of fruit. Shrubs are popular additions to cocktails and add a great tart-sweet flavour. I like using a splash of shrub in water as my pre-breakfast drink. Making your own is easy! Below is everything you need to know....but first, the ingredients. Rhubarb Berry Shrub 1/2 cup of rhubarb, chopped 1/3 cup strawberries (frozen or fresh) 1/4 cup blueberries (frozen or fresh) 1 cinnamon stick 2 sprigs basil 1/2 tsp peppercorns 1 tbsp peppermint (dried or fresh) 2/3 cup honey apple cider vinegar to fill Place all the fruit and herbs into a clean, sterile quart jar. Add the honey, being sure to appreciate how pretty raw, local honey looks flowing onto the fruit. That will do nothing for improving the flavour, but it just might improve your day. Next, add in the apple cider vinegar. Fill it right to the top. Using a clean spoon, stir the mixture to make sure all the spaces are filled and all air floats to the top. The fruit and herbs must be fully covered with the vinegar. Add more as needed. That's a good looking shrub. Very nice. If you hold it up to the window, it's like jewels glittering in the sunlight. Next, cap the jar. Be sure to put a barrier between the metal lid and the shrub. A piece of parchment paper or plastic film will work fine. The vinegar must not touch the metal as it will corrode. Lastly, label the jar. I prefer to put the whole recipe on the label. That way, I can always tweak it if I feel the next batch needs more basil, or less pepper, or whatever the case may be. Be sure to include the date, too.
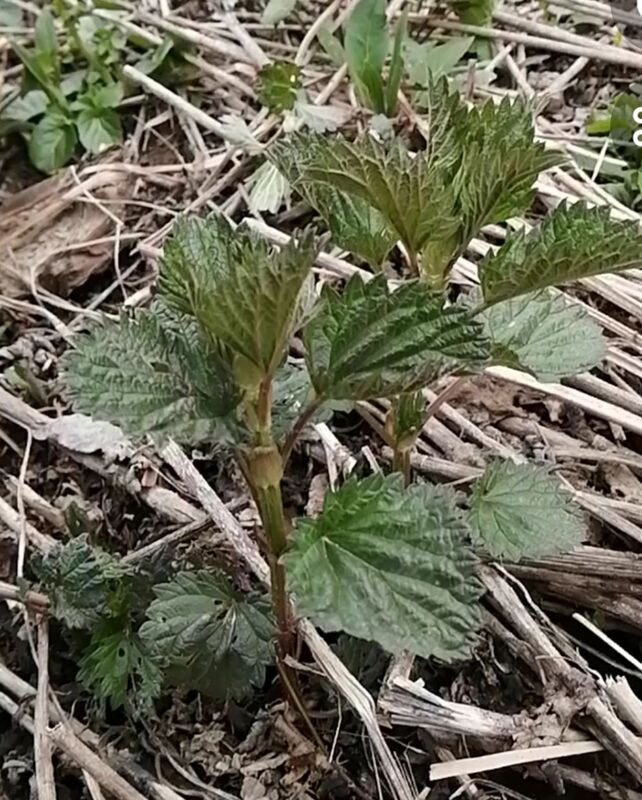
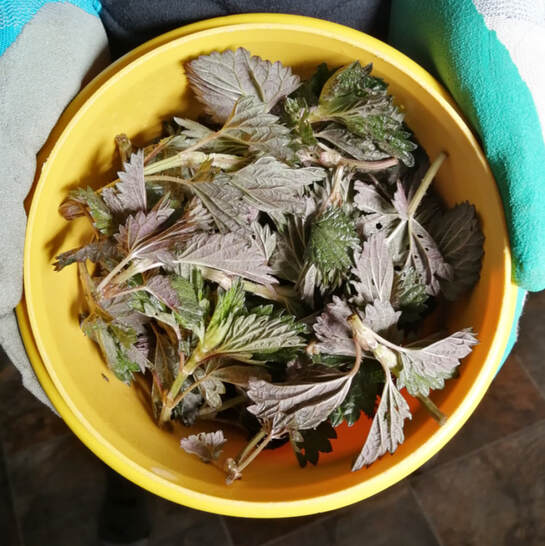
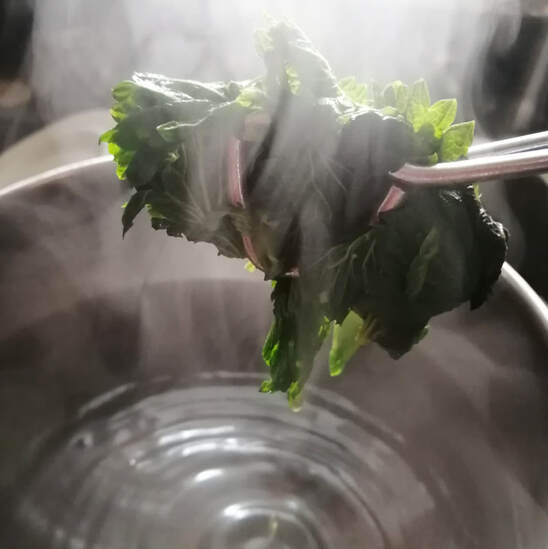
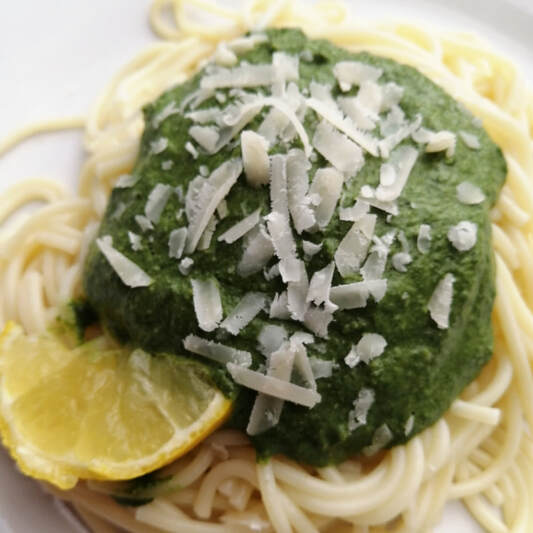
Place it in a dark cupboard for 1-2 weeks, shaking daily. After one week, taste it daily to see when it is your desired strength. When you like it, it's ready! Strain it and keep it in the fridge in a glass, airtight container. You can use it as a flavouring in cocktails, mixed with sparkling water, or even straight if you like a good strong shot of somethin' somethin'. Enjoy! .Stinging nettle is one of those plants that you love and hate all at the same time. Do you want the good news or bad news first? Bad (you must be a maritimer!)? Stinging nettle stings. It's true! Rub up bare-skinned against one by accident, and you'll know immediately by the burning sensation that you've come across a patch of stinging nettle. The good news? Stinging nettle stings! What's this? How could a stinging stinging nettle be a good thing? Well, the sting of the nettle has been used therapeutically for many generations as a counter irritant for painful conditions like arthritis. It used to be that those suffering from back pain or aching joints would flagellate themselves with the stems of fresh nettle to induce painful stings, which would result in the body rushing blood to the affected area, thus helping it to heal and lessening pain. In the same way, stinging nettle was used as a sort of homemade Viagra. Men, if unable to achieve or keep an erection, would sting their genitals with the nettle. The blood rush from the stings would result in the desired stiffness, and the evening was saved! Whether the pain killed the mood is another question, but I suppose a man's gotta do what a man's gotta do. More good news? Nettle is anti-inflammatory. Nettle is good for upper respiratory health. Nettle root supports prostate function. Nettle may help balance blood sugar. Nettle helps with allergies. Nettle supports the excretory system. Nettle can be made into fabric. Nettle is super nutritious. Nettle is delicious. Today, we'll focus on the nutritious and delicious. Nettle is packed with nutrients. It is very high in protein, higher even than beans! It is high in vitamins A, C, D, trace minerals, potassium, sodium, magnesium, and histamine. Nettle is best eaten when it is very small, first thing in the spring. The plant is tender then, and tastes best. You can still eat nettle later in the year, but the plant gets quite large and tough. The top couple inches are still tender enough to eat, but honestly, nothing beats a springtime nettle! Just be sure to cook it, steam it, or dry it. The little stingers are 'deactivated' when it is processed in this way. Eating fresh nettle is going to be downright unpleasant, and possibly dangerous. You can steam nettle, saute it with garlic and butter, or add it to any dish as you would spinach. Garlic Nettle Pesto is my favourite recipe to date! Garlic Nettle Pesto *adapted from the book Family Foraging, by David Hamilton Ingredients: A medium bowlful of fresh nettle (think spinach - it shrinks) 2/3 cups of cashews (or walnuts if you don't have cashews) A handful of garlic mustard leaves (a couple cloves of garlic will do fine) 1/2 cup grated parmesan cheese Splash of lemon juice Salt to taste Olive oil (about 2 tablespoons) 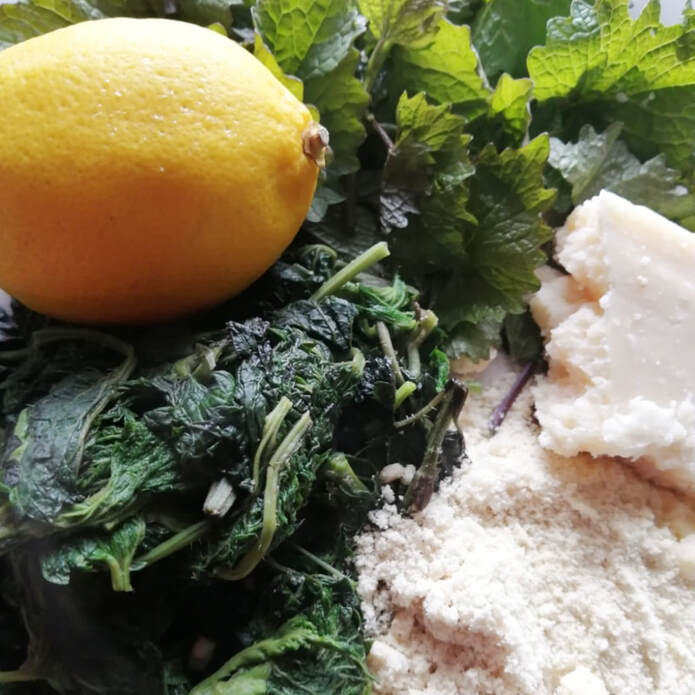 Gather your ingredients. Garlic mustard is an invasive plant that seems to be taking over New Brunswick. We pull it whenever we see it, since it is getting out of hand. Luckily, its mild garlic flavour is delicious! First, wash all your wild edibles. USE TONGS when handling the uncooked nettle. The stingers are very, very stingy. Next, steam the nettle. Some people feel that pulverising the nettle (as we will do later) is enough to deactivate the stingers. I don't think so. Once you've steamed the nettle in boiling water for 2-3 minutes, drain the liquid. You can drink this liquid as a tea, use it as a soup base, or even water your plants with it. Be sure to carefully dry the nettles using a clean dishtowel. Hopefully you will have about a cup of nettle.
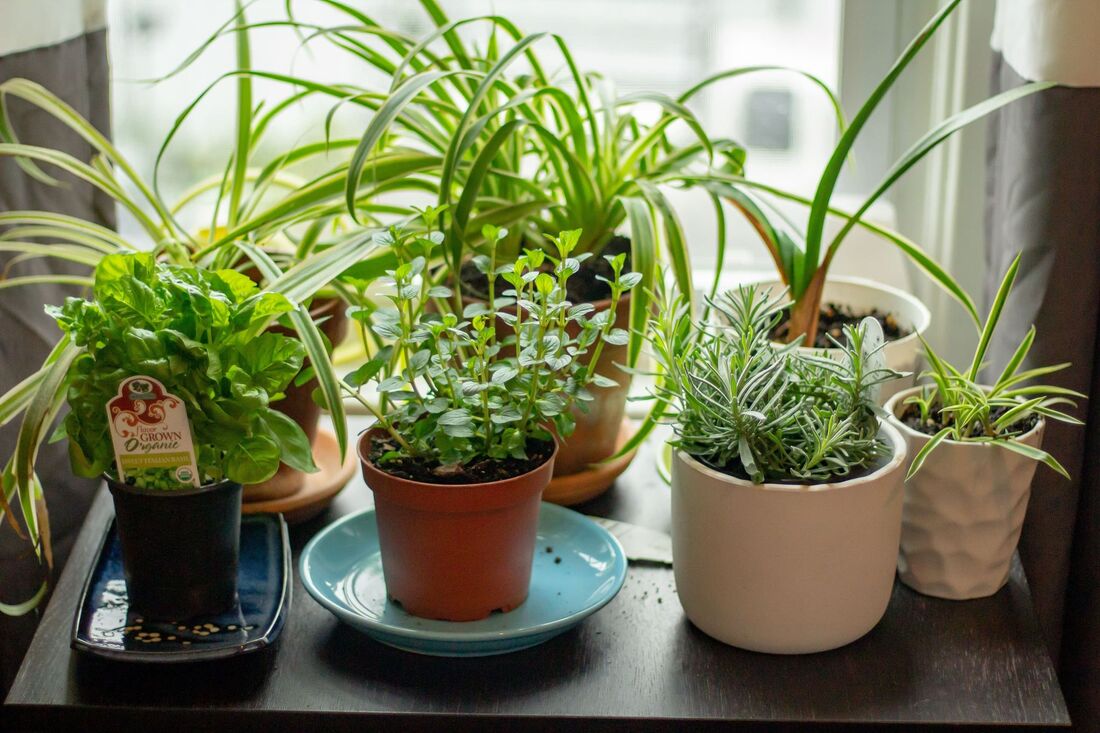
Put all the ingredients into a blender and blend it up until it is the consistency you desire. I like a smooth sauce, but a little chunk is perfectly acceptable if that's what you like! If the blender isn't quite doing the job, add a little more olive oil or nettle water to help it out. Serve over pasta, or on fresh homemade bread, sprinkled with a little lemon juice and parmesan.....Yum! Redfin was kind enough to reach out to me for my opinion on how to create your very own indoor herb garden. There are some great tips in this article.
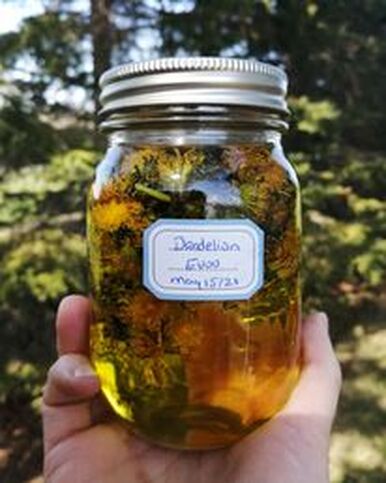
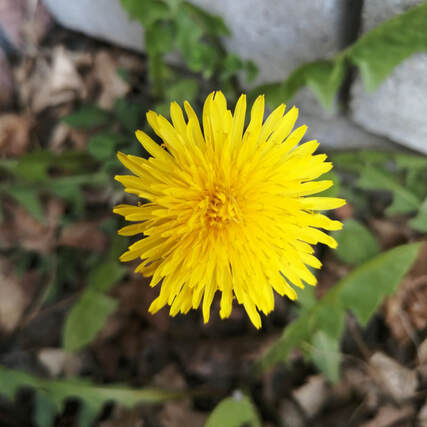
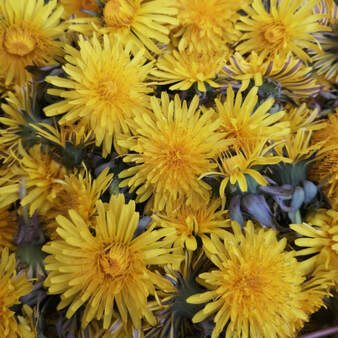
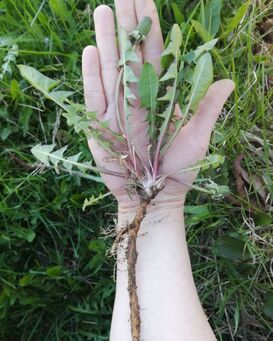
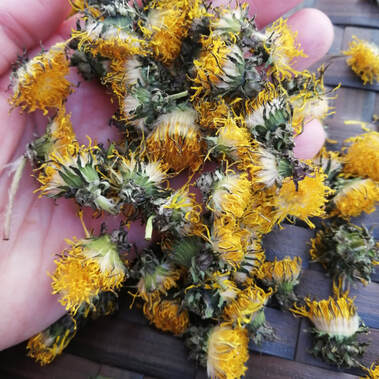
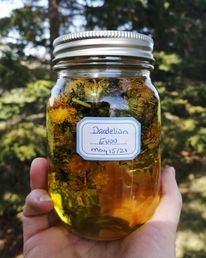
"Creating an indoor herb garden can be one of the most fulfilling and cost-effective ways to have fresh herbs on hand year-round. While backyard gardens are great, they limit your growing season to the summer months and buying your herbs at the grocery store often leaves you with far more than you need at a single time. That’s why we reached out to the experts in home gardening from Vancouver to Miami to provide you with some tips..." Want to read more? Follow the link: www.redfin.com/blog/creating-an-indoor-herb-garden/ Every year, around mid-May, my husband and I have our annual springtime fight. My favourite day of the year is when the weather warms up enough that all grass finally grows, and the dandelions spring out of the ground, lifting their chipper yellow heads to greet the sun. My husband's favourite day of the year, bless his heart, is the first day he gets to mow all my dandelions down. Therefore, my favourite day of the year is also the day I try to beat him to the yard to save as many dandelions as I possibly can. Why? What could I possibly want with those dandelions? Well, other than being delicious, cheerful, and a very precise way of finding out if you like butter (What?! You don't know what I'm talking about? I'll tell you at the end.), dandelion heads are used to make dandelion herbal oil. The herbal oil makes a wonderful massage oil for sore, aching muscles and joints. It can also serve as a base for making dandelion salves, lotions and soaps. It starts with dandelions - pick them bright and beautiful, just the tops. Be sure to pick responsibly. Your herbs should be from an unsprayed area, away from roadsides and farms. Be aware that many parks and households spray their grass in hopes of getting rid of 'weeds', dandelions included. Therefore, you need to be sure that the dandelions are clean and chemical free. Remember - what you start with will end up in the finished product. Dandelions have some lookalikes if you aren't used to identifying them. There are certain plants that have a very similar blossom. There are certain traits to look for when identifying dandelions. The name dandelion is thought to come from the French Dents de Lion (lion's teeth). This is the first clue when it comes to correctly identifying dandelion. The leaves are 'toothed', deeply lobed, and smooth. The leaves are basal, meaning they only grow at the bottom of the stem, and are arranged in a rosette pattern. There will only be one stem holding one flowerhead. The stem is hollow, and produces a milky sap. The flowerheads contain between 150-200 yellow ray florets and no disk florets. The florets spread outward, like a sunshine. Under the flowerhead are green bracts. If you were to dig up a dandelion, you would find one long taproot. The root, and all parts of the plant, are edible. Now that you have correctly identified dandelion, ascertained that your patch is clean, and picked them, you'll want to bring them home and prep them. Normally, an herbal oil is made only with dry herbs. Using fresh or 'damp' herbs can encourage mold growth and spoilage in your herbal oil. There are a few exceptions to this, and dandelion is one of them. If dandelion heads completely dry, they go to seed, which is not what we want. That said, wet dandelions are not desirable, either! The solution is to wilt them to get as much of the moisture out of them as possible without having them turn to a white fluff. Spread the blossoms on a clean, dry surface to dry. This can be a screen, sheet, basket, dehydrator, etc. Using a screen or sheet outside is my preference as it allows any bugs in the blossoms to make a break for it! Be sure the area is warm and dry, with good airflow. Then, you wait! Depending on the temperature, you might want to give it a few hours or leave them overnight. Once they are good and wilted, it's go time. Place the dandelion heads in a clean, dry, sterile jar. If you're using the folk method, you'll want to aim for about three quarters of the jar filled. The folk method is perfectly fine for this type of infusion. Next, fill the jar with your carrier oil, right to the top. Try to fill the jar to within an inch of the rim. The less airspace, the less chance of spoilage. If the plant matter is floating, poke it down with a chopstick or handle of a wooden spoon. As for the oil choice, in my case, I used olive oil as it's a good, all purpose oil that has a long shelf life. Some prefer to use coconut oil, sunflower oil, grapeseed or avocado. It really is a matter of preference determined by what you plan to make with the oil later. For a general salve, olive is fine. If you were making a face cream, grapeseed or apricot kernal would be nice! If the plan was to use it in a roller bottle, I'd probably go with grapeseed or fractionated coconut oil. Finally slap a label on that bottle - name, ingredients, and date. Put a piece of parchment paper over the rim, cap it, and shake, shake, shake. You'll want to keep it in a warm, spot and shake it every day. I keep mine in a kitchen cupboard, the warmest room in the house. If you prefer to make a solar infusion, you can definitely do this! The benefit of this is that the warmth of the sun will accelerate the infusion, and make for a much 'sunnier' oil. However, the warmth is good, the light is not. So, put the jar into a paper bag before placing it on a sunny window sill. That will allow the benefit of the sun's heat without the damage of the sun's light.
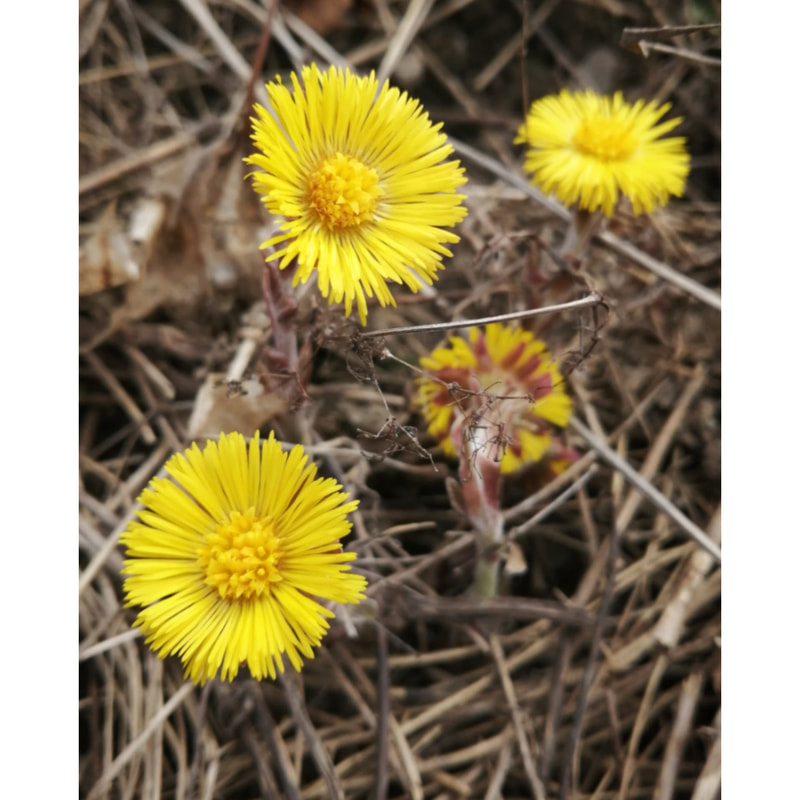
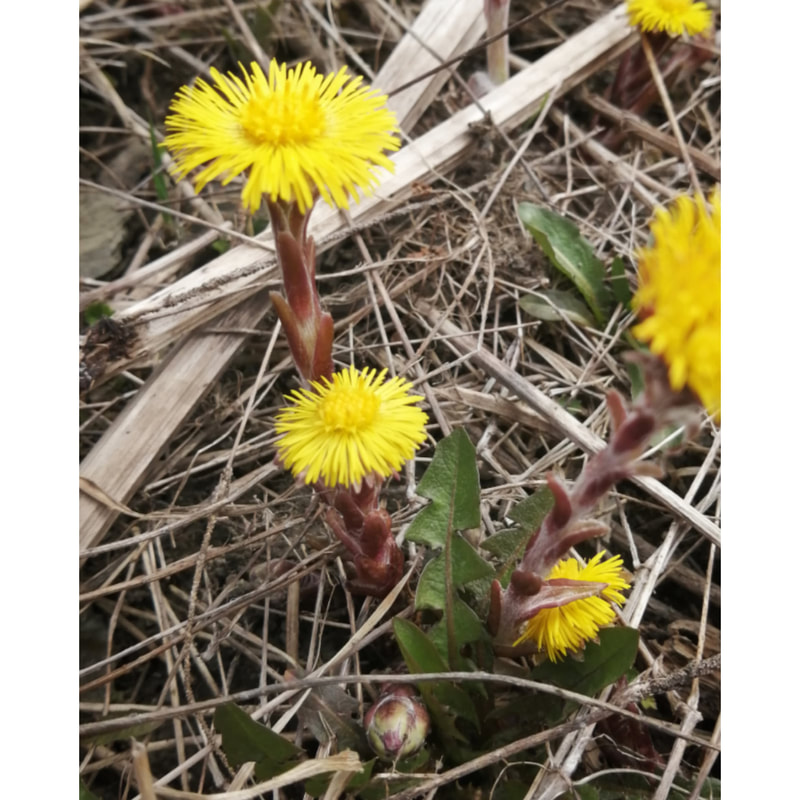
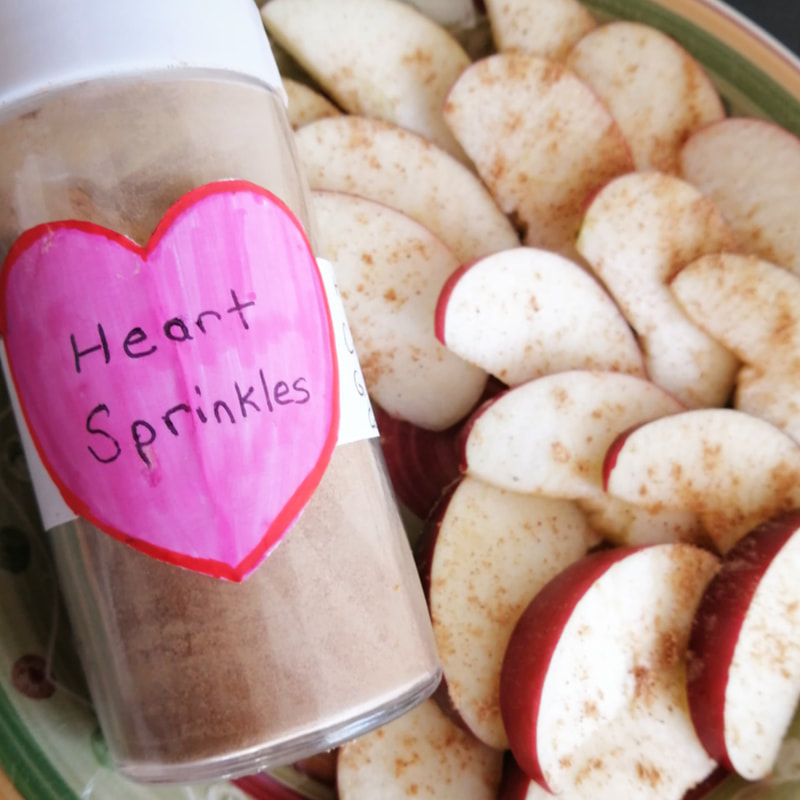
After 3-4 weeks, you can expect that it is finished macerating (steeping). At that point, strain out the plant matter with a cheesecloth or fine sieve. The dandelions can be composted. You'll want to keep the oil in a clean, dry, sterile bottle...labeled, of course! What will you make with your dandelion oil? Let me know in the comments! Oh, and how do dandelions determine if you like butter? When we were kids on the playground, this was of great concern to us. There was no way to simply *know* if we liked butter. Of course not. So, we would hold dandelion heads under our friends' chins, and ask, "Do you like butter?!" If the yellow of the dandelion was reflected on our friends' skin, then, yes, of course they liked butter! If there was no yellow, then the answer was no. Some of us had friends who would smash the flowerhead into our chins, leaving a semi-permanent (depending on how often you washed your face - not a big concern for a 7 year old) yellow stain on our skin. That meant you were truly a butter fan! If the red breasted robin is the bird symbol of spring's arrival, then coltsfoot is the plant world's version. These tenacious little flowers bravely pop their buds out of the ground, of which they prefer disturbed, sandy soil like by roads and riverbeds, often before the snow has completely melted, and lift their yellow heads to the sun. Their cheerful presence after the long, barren (or so it seems) winter appears to communicate, "Hey! It's a fresh start! We're still here, and we're going to make it. Good things are coming!" Coltsfoot (Tussilago farfara) is one I've always thought a bit strange in that it seems to start with the end, and end with the beginning. Most plants will send out their shoots, stems, leaves, and then blossom and seed. Coltsfoot, on the other hand, begins with the flower, seed, and then develops the leaves. In the past, coltsfoot was referred to as "son before the father" for this reason. Although it does propagate by seed (and the seeds need hardly any time at all to germinate - just 2 days!), coltsfoot develops and spreads by rhizome as well. The leaves do look like a colt's hoof print, and can get quite big as the summer goes on. The top of the leaf is somewhat waxy, and the bottom of the leaf is covered with fine, white hairs. The question of whether coltsfoot is edible is a tricky one. The roots contain pyrrolizidine alkaloids, a toxic substance that can damage the liver. The leaves are thought to contain this, too, though in lesser amounts. For this reason, it is best not to consume the root, and to consume the aerial parts in very small amounts. Those who are pregnant, breastfeeding, or who have liver issues should keep away from coltsfoot. It is said that the buds, stalks, and leaves can be added to salads. The stalks and leaves can be boiled and seasoned with salt and pepper just like a vegetable and added to potato dishes. Traditionally, coltsfoot leaf ash was used as a salt substitute as it is quite high in sodium. Traditionally, and even today, coltsfoot has been used as an herbal remedy for certain respiratory ailments. It can be used as a tea, tincture, or even in a smoking blend to treat coughs, asthma, and congestion. Often, it will be combined with licorice, mullein, or thyme. Of course, as with any health concerns, it is best to seek the guidance of your healthcare practitioner and a trained herbalist to ascertain whether coltsfoot is right for you. ** This is fun, right?! And that's all it is for now. Information on the traditional uses and properties of herbs in this website are for educational use only, and are not to be mistaken for medical advice. Every attempt has been made for accuracy, but none is guaranteed. Many traditional uses and properties of herbs have not been validated by the FDA or Health Canada. If you have health issues, concerns, or questions, consult your health care practitioner. ** Here's more info: https://www.ediblewildfood.com/coltsfoot.aspx https://www.naturewatch.ca/plantwatch/coltsfoot/ https://www.live-native.com/coltsfoot/#:~:text=Propagation,the%20seeds%20begin%20to%20germinate. It's always an emergency when I run out of Heart Sprinkles. Ever since I discovered this recipe in Rosemary Gladstar's book, Medicinal Herbs, A Beginner's Guide, I've kept a constant supply in my spice drawer. She calls it Sprinkles for the Heart, but I kind of like the idea of Heart Sprinkles. You really must try it. It's good for your heart, and so tasty! Hawthorn (Craetagus laevigata) is a tree that grows quite freely here in New Brunswick. Its blossoms remind me of apple tree blossoms, and the berries do indeed look like tiny little apples. The hawthorn is one of the most respected cardiovascular tonics around. The berries, leaves, and blossoms are used (preferably in conjunction) to make tinctures and teas. They are rich in bioflavonoids, antioxidants, and procyanidins, all of which nourish and tone the heart. The result is that the heart muscle is strengthened, blood pressure is regulated, and the heart beat is normalized. Hawthorn is often used as a preventative, but is also used to treat heart problems. It is one that must be used regularly, though, as hawthorn does not stay in the body for very long. It is thought that hawthorn helps the emotional heart, too, not just the physical heart. You'll see it often in grief formulas, especially in combo with milky oats, St John's wort, and lemon balm. Heart Sprinkles are used as a spice, however, and are not necessarily for preventing or treating heart problems. Shouldn't our food and snacks be useful, healthy and delicious, though? A trained herbalist can give more tips on how to use hawthorn for health. For now, enjoy the Heart Sprinkles! Heart Sprinkles - a recipe by Rosemary Gladstar 2 parts hawthorn berry powder 1 part cinnamon powder 1/2 part ginger root powder 1/8 part cardamom powder 1. Measure out your ingredients. Mix them well. 2. Put them into a spice bottle, preferably one with a shaker top. 3. Put that stuff on everything! What's everything? Well, here's a few ideas: *sprinkle on oatmeal *sprinkle on cut fruit (berries, apples, etc) *mixed into plain yogurt *sprinkled on a latte *added to smoothies *as a truffle/cookie garnish 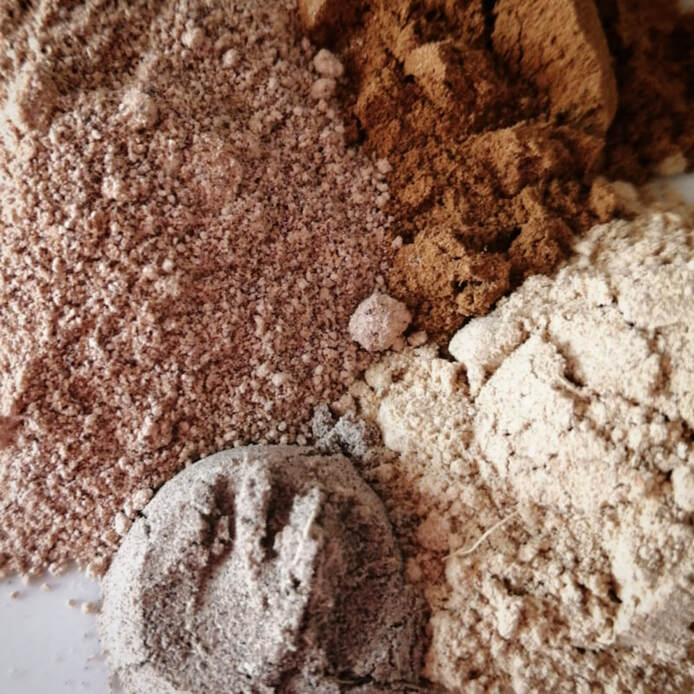 Clockwise from the top: Cinnamon, ginger, cardamom and hawthorn berry Clockwise from the top: Cinnamon, ginger, cardamom and hawthorn berry Of course, don't forget to label your creation. 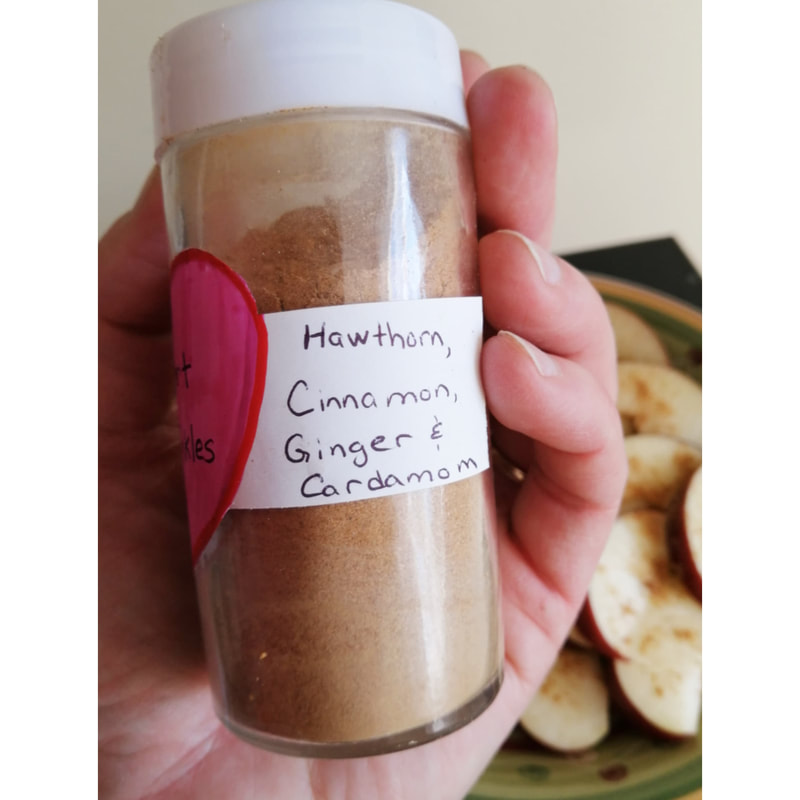 ** This is fun, right?! And that's all it is for now. Information on the traditional uses and properties of herbs in this website are for educational use only, and are not to be mistaken for medical advice. Every attempt has been made for accuracy, but none is guaranteed. Many traditional uses and properties of herbs have not been validated by the FDA or Health Canada. If you have health issues, concerns, or questions, consult your health care practitioner. ** Back in the spring of 2020 (Oh, my, remember that year?!) I posted an informational video on harvesting spruce tips. I had a little tutorial on making spruce sugar which was so much fun, smelled amazing, and burst with possibilities! But, what possibilities, exactly? The spruce sugar has sat in my cupboard all these months simply because I wasn't really sure what to do with it.
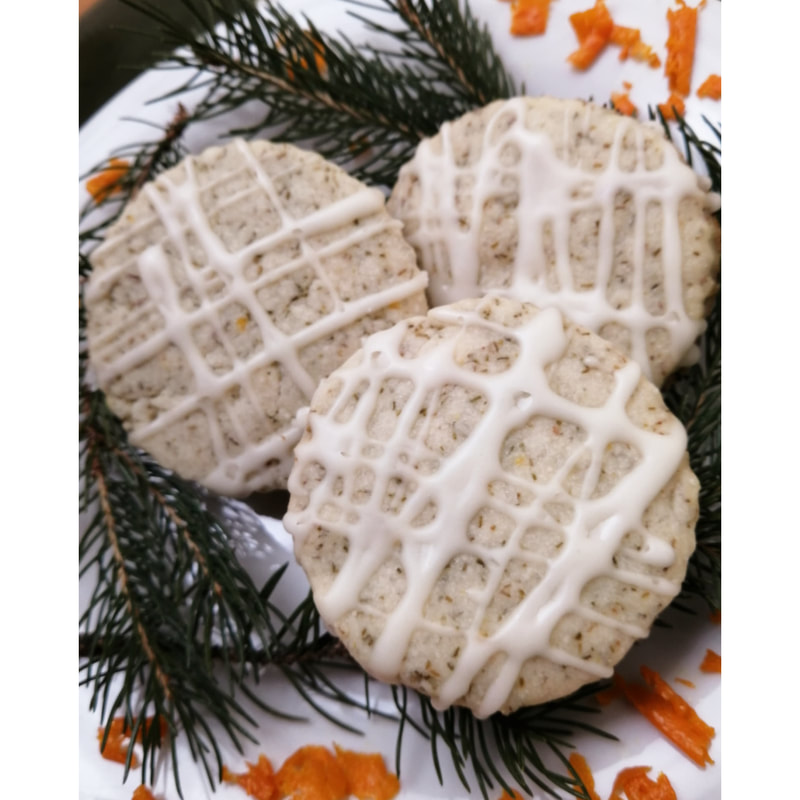
Until today. I present to you: Spruce Orange Shortbread Cookies! I'm a huge fan of shortbread. I'm not sure why I didn't think to do this earlier. It's a rather dry dessert, but when it's made right, it's fantastic. The initial snap of the cookie when you bite into it, the melting in the mouth, and the flood of flavour....oh, my! Shortbread as a square is very simple, and usually requires minimal ingredients - butter, flour, and icing sugar. Cookies are a bit more complicated, but still very simple. The spruce and orange flavours in this recipe are rather mild, so don't be afraid. It's a delightful experience, and kind of a hoot to tell your dinner guests you're serving them tree parts. Spruce Orange Shortbread Cookies 1 1/2 cups of butter 2/3 cups of spruce sugar 1/4 cup icing sugar zest of one orange 2 1/2 cups flour 1/2 cup cornstarch 1/4 tsp salt Icing icing sugar orange juice spruce syrup meringue powder 1. Cream the butter, sugars, and zest. 2. Add the flour, cornstarch and salt. 3. Leave to chill in the refrigerator in an airtight container for at least an hour. 4. Preheat the oven to 350 deg F. 5. Roll out the dough on a lightly floured surface, or on a piece of parchment paper to about a 1/4 inch thickness. Cut out shapes and place on a cookie sheet. 6. Bake around 10 minutes or until the edges are slightly browned. Do not overcook. 7. Cool completely before icing. 8. The icing is very much 'taste as you go'. Start with around a cup of icing sugar and a teaspoon of meringue powder. Add orange juice and spruce syrup to obtain a very liquid, streamable icing (think white glue thickness). Adjust the taste to suit yourself by adding more or less of the juice and syrup. Drizzle over the cooled cookies. Allow to dry completely before storing. Enjoy! |
Emilie
Clinical herbalist. Mother. Teacher. Ever student. Archives
February 2022
Categories
All
|

 RSS Feed